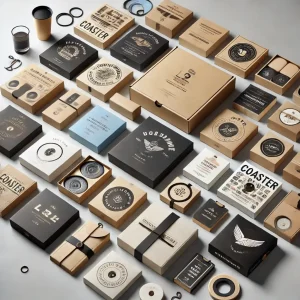
You want jewelry that shouts you the moment a customer opens the box. Mastering core jewelry making techniques is the fastest route to that signature style. Later, polished packaging from Pakoro locks in the premium feel, so clients remember your name long after checkout.
1. Get Your Foundations Right
1. Pick Smart Materials
Gold, silver, or brass? Natural gems or lab-grown? Think of each choice as a branding cue:
- Gold (14 K/18 K) balances durability and luxury.
- Sterling silver offers bright shine on a budget.
- Quartz & garnet deliver color punch without diamond prices.
Always match material hardness to usage. A 7+ on the Mohs scale resists scratches in rings that get daily wear.
2. Stock the Essential Tools
You never fight a project when you wield the right gear:
- Round-nose, flat-nose, chain-nose pliers keep wire under control.
- Jeweler’s saw slices curves cleaner than snips.
- Bench pin + saw frame reduce vibration so cuts stay true.
Upgrade later with a small torch, rotary tumbler, and digital calipers for pro-level precision.

3. Create a Safe & Efficient Bench
Light matters. Position LEDs above each hand. Vent fumes out a window if you solder indoors. Finally, stage tools by task—cutting on the left, forming in the middle, finishing on the right—so your workflow never breaks stride.

2. Nail the Basic Jewelry Making Techniques
1. Cut & Solder Metal
Secure your sheet with bench pins. Saw on the downstroke only; blades last longer. When soldering, flux both pieces, heat evenly, and watch for that quick silver flash that says the join took. Quench, pickle, rinse—done.
2. Wire Wrapping & Looping
Choose dead-soft sterling when you’re learning; it forgives over-bending. Form loops in one smooth roll. Wrap tails neatly under the loop for strength and a pro look. These quick links let you build earrings, charms, and entire chain sections in minutes.

3. Texturing & Polishing
Texture first, polish last. Use:
- Ball-peen hammer for rustic dimples.
- Chasing tools for crisp lines.
- Roller mill + lace for organic patterns.
Tumble-polish with steel shot for mirror shine while you prep the next batch.
3. Step Up to Advanced Craft
1. Stone Setting Essentials
Start with bezels: seat the cabochon, push the wall gently until it hugs the edge. Graduate to prongs for faceted stones—remember, even pressure prevents cracks. Feeling confident? Try pavé to blanket a surface with micro-sparks of brilliance.

2. Metal Smithing & Forging
Anneal, quench, and pickle. Then hammer across a mandrel to draw down wire or flare bracelets. Each heat cycle softens metal so you can chase creative curves without splits. Solder seams invisible to leave nothing but seamless flow.
3. Enameling & Inlay
Sift powdered glass onto copper, fire at 800 °C, and watch glass fuse into a glossy plane. Or carve channels, lay crushed opal, and seal with resin for color that pops against metal edges. Precision here sets you miles ahead of mass-market look-alikes.
4. Finish Like a Pro, Present Like a Star
1. Finishing Moves
File rough spots, sand 400→600→1200 grit, then polish. Ultrasonic baths lift rouge residue, so stones sparkle unclouded.
2. Packaging That Sells Your Story
Customers judge before they touch the piece. That means cushioned inserts, rigid walls, and color that syncs with your brand palette. At Pakoro, we craft jewelry packaging that protects fragile settings and telegraphs luxury in one glance. Need custom sizes or eco-friendly board? Ping us here ➜ Contact Pakoro.
Pro Tip: Slip a microfiber cloth inside every box. It cuts tarnish complaints and earns you instant “thoughtful brand” points.
5. Your Next Steps
- Choose one new technique—maybe wire wrapping—and practice for 20 minutes daily.
- Order sample packaging from Pakoro and test unboxing with friends.
- Launch a limited drop; use feedback to refine both craft and presentation.
Stay patient, keep experimenting, and remember: when impeccable technique meets standout packaging, you don’t merely sell jewelry—you sell an experience customers can’t wait to repeat.